
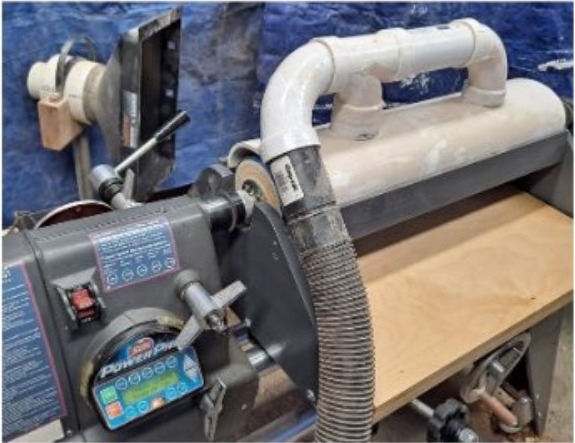
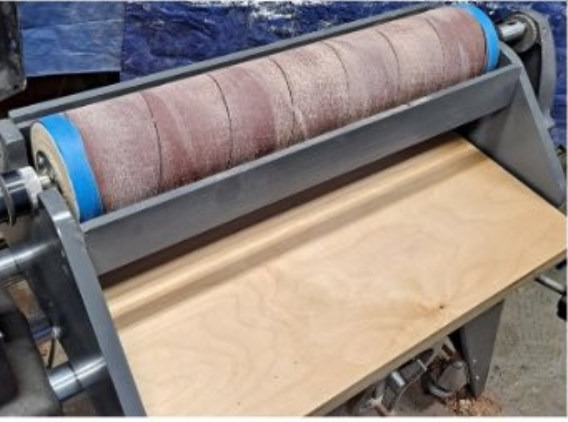
Here is a drum sander that will work as shown on any 16″ and larger lathe. With a little modification it would fit on a 14″ lathe too.

I posted this on the Shopsmith Owners Group on FaceBook and had so many requests for information I thought it might be a good fit for our newsletter too.
The overall dimensions are 20″ x 25-3/4″. The drum sander is on a 3/4″ steel square tubing rectangle frame. To center the sander on the tubes, there are 4 short pieces welded to the frame side pieces. This frame is held on the SS tubes using 2 short pieces of 3/4″ square tubing and long 1/4″ bolts.

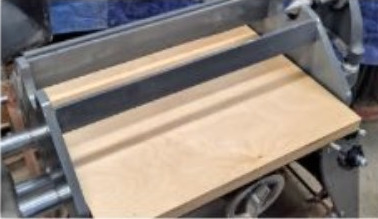
The sides and facer boards are made from 3/4″ plywood and 3/4″ pine. (this could be thinner, it is only for dust collection)
The platen is made out of 2 pieces of 3/4″ x 20″ x 24″ Baltic birch plywood glued together. (One would probably be enough). It has two 4″ door hinges holding it to the steel frame.
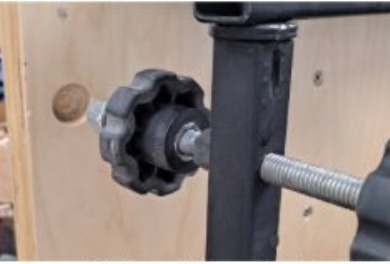
It has two adjusting knobs, one on each side of the platen. They are made out of 2 short pieces of 5/8″ all-thread and 4 3″ x 5/8″ threaded knobs. Two of the knobs are epoxied to the end of each threaded rod.
I used 2 knobs on each thinking I would need to tighten them down each time I set it but the extra knobs for a locking mechanism is not needed.
The front piece of the frame is held in place by two bolts, one on each end. This allows the piece to swivel.
Two holes are drilled in the front frame, one on each end of the 5/8″ nuts are welded to the frame. The all-thread pieces are inserted thru the frame and screwed thru the nuts.
The top end of each all-thread has a locknut just to give it a rounded surface to mate up with a shallow hole on the bottom of the platen. You can now adjust the platen up or down as needed. The drive end of the drum is any coupling that will fit your spindle.
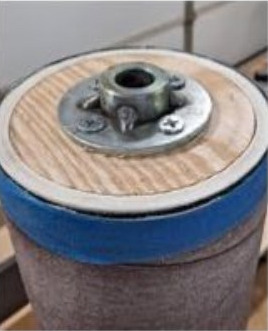
This could be as simple as a 1″-8 nut mounted to a glue block. This is turned to fit the inside of the 4″ x 24″ PVC tube.
The tailstock end is made starting with a 2-1/8″ mortise in a sq piece of 2 x 6. This is used to hold it in a 50mm chuck. Then turned to fit the PVC tube.
Drill a hole in the center using the lathe and fit it to a 60 degree cone live center. The live center holds the right side of the drum while in use.
I secured each plug in place in the PVC using 4 countersunk screws.
Then the 4″ PVC drum is trued up on the lathe.
I bought sticky backed Velcro and Velcro backed sandpaper from Grizzly.com. They sell it for their drum sanders.
Wrap the Velcro at an angle on the PCV much like a candy cane and then the sandpaper in the opposite direction. Wrap the ends with a layer of tape to keep the sandpaper from coming off when in use.
To use, set your lathe speed about 1800 rpm. If your lathe can run in reverse you will feed the wood from the front as shown in the pictures. If not, turn the unit around on the tubes and feed it from the back. It does not make any difference.
Make a push stick to push the wood thru the unit. As with any sander don’t let it set in one spot too long.
I made up the dust collection system using 2″ and 4″ PVC pipe. Cut the 4″ PVC down the center length wise and using a heat gun, heat
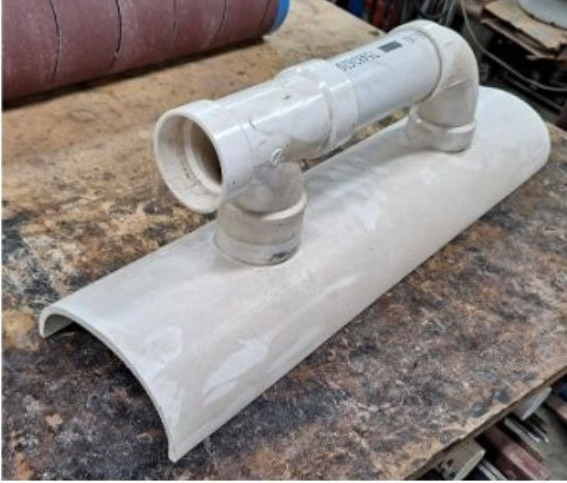
up the top of the tube and spread it out to fit the dust panel sides you made above. I cut two holes on the top of the PVC and inserted very short pieces of 2″ PVC attached to the 90 degree L’s. I took another piece of the 2″ PVC heated and forced it onto a pine form I had made to stretch it out to fit my vacuum. Once it cools and hardens it will stay and be a perfect fit. Happy sanding!