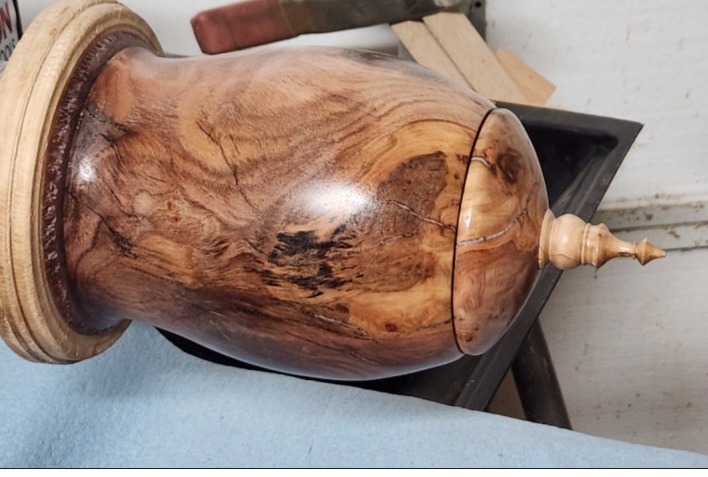
 I was asked recently to make an urn for my neighbor’s dog that had to be put down due to cancer. I selected a nice eucalyptus burl and cast it in resin in my pressure pot, then put it on the lathe and began shaping it, drilling it and then hollowing it with my Trent Bosch Stabilizer Systerm.
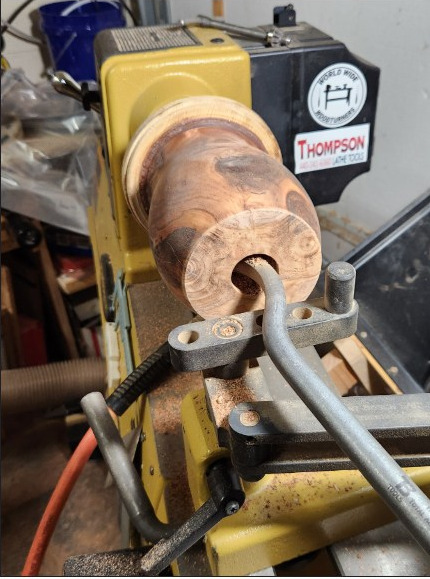
 Due to the size, shape and depth of the piece I began to worry about wall thickness and how I was going to avoid going through the side or bottom of the piece.
We at Worldwidewoodturners.org have had a couple conversations and demonstrations of how to complete this project in the past,and a camera based visualization system has been discussed. I had even purchased one of the small 12-volt cameras and had an old power supply hanging around my shop. I also had an old 21-inch TV that has an AVI adapter plug in the back so I figured I could make it happen when the time came.
The time had come to put these components together, and build that system, but I was having a bit of brain fog and needed some help and ideas.
In true self-taught wood turner fashion, I went on to YouTube and searched for how to make a Hollowing System Camera like the kind Trent Bosch sells for around $750 Bucks, but “on the cheap”. I came across a new to me Wood Turner on YouTube who
 goes by the handle of “Tony Turns Wood”. He has a system called the “Poor Man’s Visualizer”. Tony even gives you a parts list of all the components he uses to put his system together.
It’s “Ranger proof,” just what an old Grunt like me needs.
Here’s a link to the video of how Tony puts his visualizer together, with step-by-step instructions and a parts list: https://www.youtube.com/watch?v=qSthIZCROYg&lc=UgxwDvnFnQDfMjPnRyh4AaABAg.AHkd2NFpLfAAI1HLmIMb5o
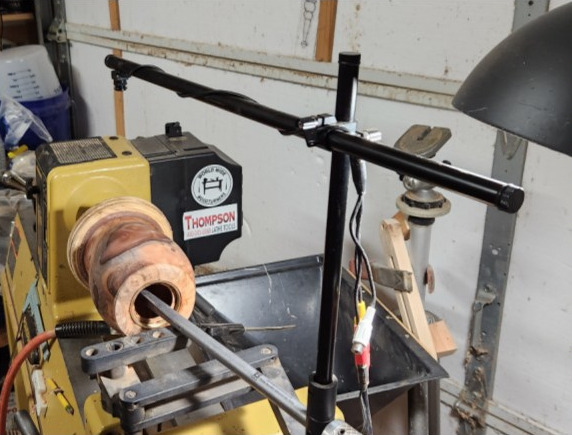
My set up was super simple: I had already purchased the base from Trent Bosch, the 15MM rods and right-angle connector from Amazon, and used 5-minute epoxy to mount my camera to what was going to be my upper support rod. I then connected a 12” AVI cable to the back of the TV, and the other end to the camera that I had mounted on the 15MM upper rod and my power supply. I then mounted this to the base of my Stabilizer and I was in business.
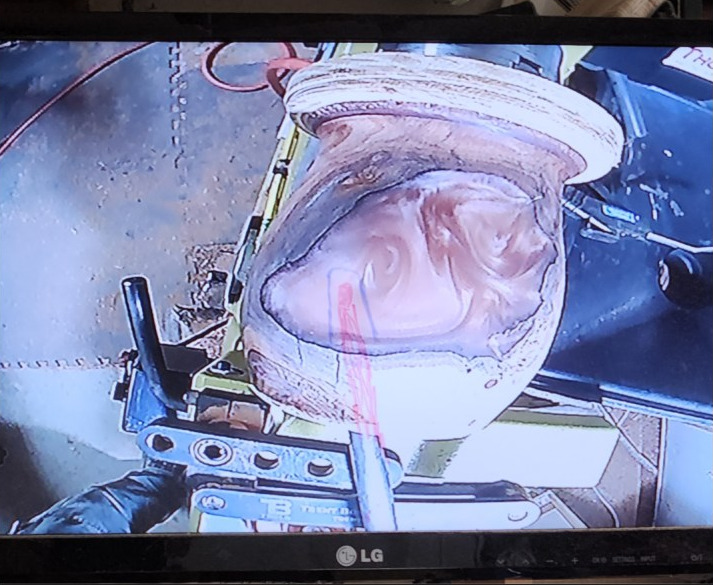
To mark the tip of the tool I am ,using I just use a dry erase marker on my TV screen (you can use a sheet of plastic or plexiglass if you don’t want to draw on your screen). Trace the tool tip, and part of the shaft, so you know where exactly the tool is in the hollow form.
I use a homemade gauge to measure the wall thickness I want and draw a line around the tip of the tool at that distance. For this urn, I used a 3/16th” wall thickness.
Once your thickness is set, all you have to do is start hollowing until you get the desired depth and thickness.
Hollowing is now a breeze! I can see exactly where my tool is in the hollow form, and I can get the exact wall thickness I want.
Changing tool profiles and outlines is just a matter of wiping away the outline of the old tool and retracing the new one when I swap things out from a strait bar to a curved tool.
A Special Shout out to Tony from Tony Turns Wood for the ideas from his channel for this build. I hope this will help someone build a tool of their own in their shop. Please go to his YouTube Channel and check out his work when you get a chance.
Happy Turnings!!