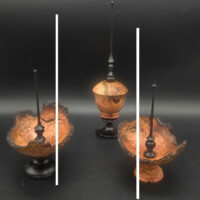
Laser Engraving for Wood Turners ( Part 3 ) – Todd Fipps

… Continued from March 26, 2025 Choosing Safe Materials for Engraving: Wood and Beyond Selecting the right material for laser engraving is just as important as choosing the correct machine settings. While wood is the most commonly used material for woodturners, laser engraving can also be applied to leather, acrylic, metal, glass, and more. However, Read More …

Laser Engraving for Wood Turners (Part 2) – Todd Fipps

… Continued from March 19, 2025 Newsletter Health and Safety Considerations: Engraving with Confidence and Caution While laser engraving is an incredible tool for adding intricate details and personalization to wood-turned projects, it’s important to recognize that you’re working with a powerful beam of focused energy— essentially controlled fire. That means safety should always be Read More …

Carving Station with Bob Grinstead

During the 2025-03-19 meeting of World Wide Wood Turners, Bob Grinstead showed us his homemade carving station. Here is some information about the station, allowing your to use it to create your own version. Parts needed for assembly Parts list ($26 for parts from Tractor Supply): 1” – 8 bolt various lengths (3) 1” lock Read More …

Laser Engraving for Wood Turners (Part 1) – Todd Fipps

Getting Started with Laser Engraving Woodturning is a craft rooted in tradition, but that doesn’t mean it can’t benefit from modern technology. For generations, woodturners have used chisels, gouges, and fine carving tools to add embellishments and details to their work. While these methods produce stunning results, they also require years of practice, steady hands, Read More …

Homemade Chainsaw Mill by Bob Grinstead

Here is my chainsaw mill for those who haven’t seen it. I folds up into a small package you can put into your car. 4 pieces total. The beauty of this is I only load the logs once, then leave them on my trailer to cut.

In use, I load the logs on my trailer, then with 2 screws, screw the mill to my trailer. Roll a log in place, Clamp the log down with scrap wood at each end, and cut. There is a pulley system to make the cutting easier. Make all cuts down one side, raising the saw for each cut. Usually it takes 3 cuts for each side to get 2) 5″ blanks. Then slide/turn the log around and cut down the other side lowering the saw as you go.

Read More …