
Go to the bottom to watch the video.


Plan Design Board Set-Up
Plan Design Board includes the following parts:

- Backboard for base of the construction.
- Bottom rail.
- Left & right side guide rails, assure each side glide rail is perpendicular
( 90° ) to the bottom rail. - Tape measure on each side rail.
- Paper clips and bar, with clips mounted on bottom rail.
- The sliding guide for paper measurement.
- Graphic for sizing the segments.
- The cut angle is 10° (18×10=180) off vertical
- The cut angle is 12° off vertical
- The cut angle is 18° off vertical
- The cut angle is 22.5° off vertical
Designing of the Graphic
Sample for 18 segment ring with 10°:

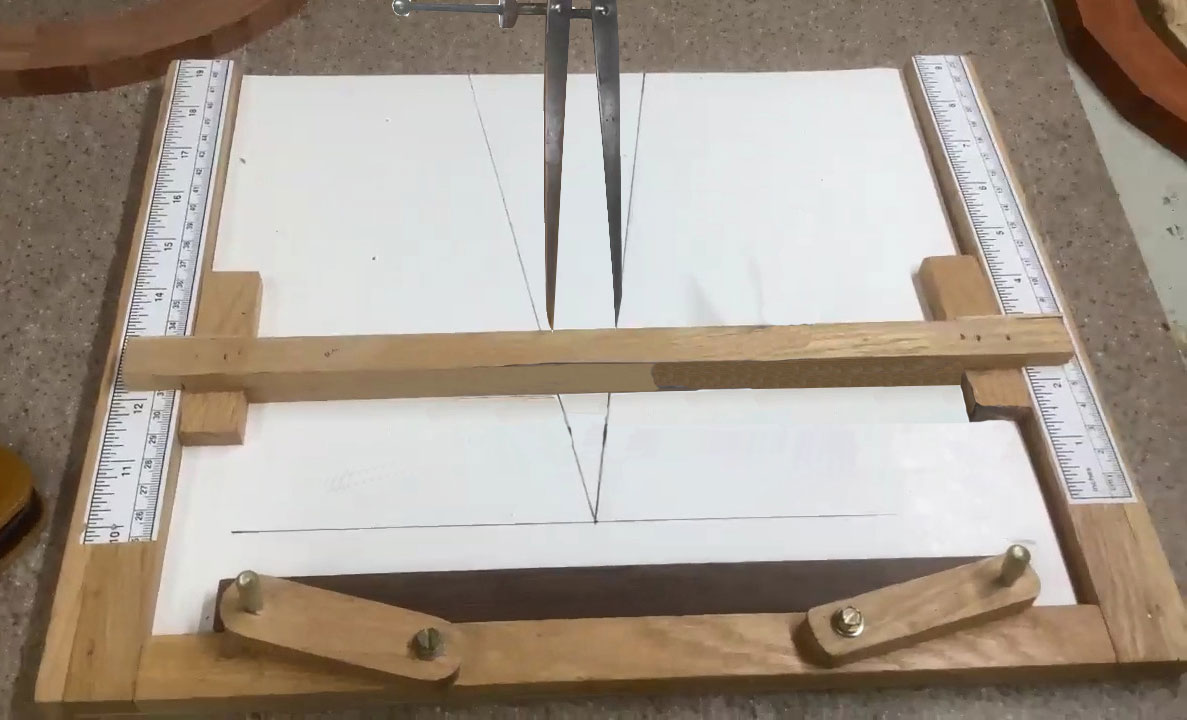
- Using the paper clips and clamp bar, clamp a piece of paper into the frame.
- Position the top edge of Sliding Guide all the way down to the Zero
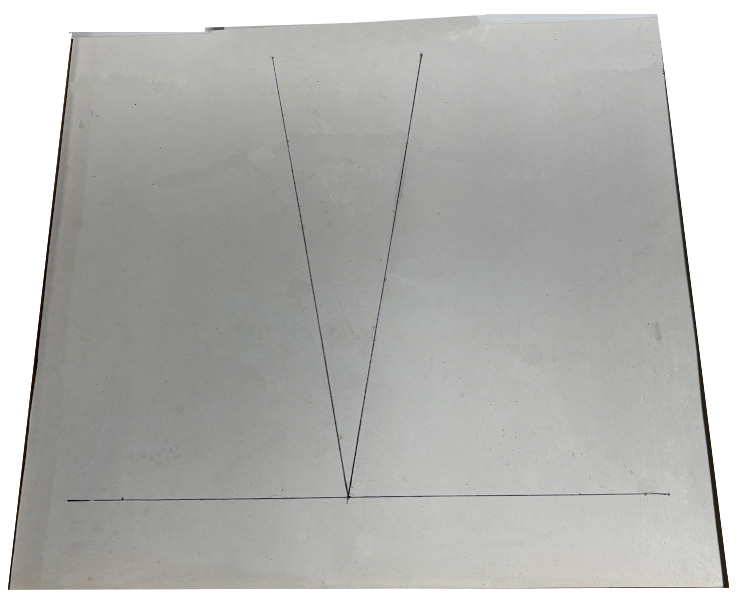
(0) position on the side rulers. - Draw a line along the top edge of the Sliding Guide, making sure the line is even with the
Zero position of the rulers - Draw a vertical line off the Sliding Guide
- Using a protractor, draw a 10° line off center line on each side, start from
the common point where the vertical and horizontal lines meet. - Use the angles listed below to create similar graphics for differing numbers of segments …
- The cut angle is 10° (18×10=180) off vertical
- The cut angle is 12° off vertical
- The cut angle is 18° off vertical
- The cut angle is 22.5° off vertical
When used, The distance between the right and left 10° lines will be the segment length.
This graphic should be saved. I can be used for all rings with the same number of segments (in this case, 18 segments).
Measuring the Segment Lengths
Sample: measure the segment length for a ring of diameter 10.”
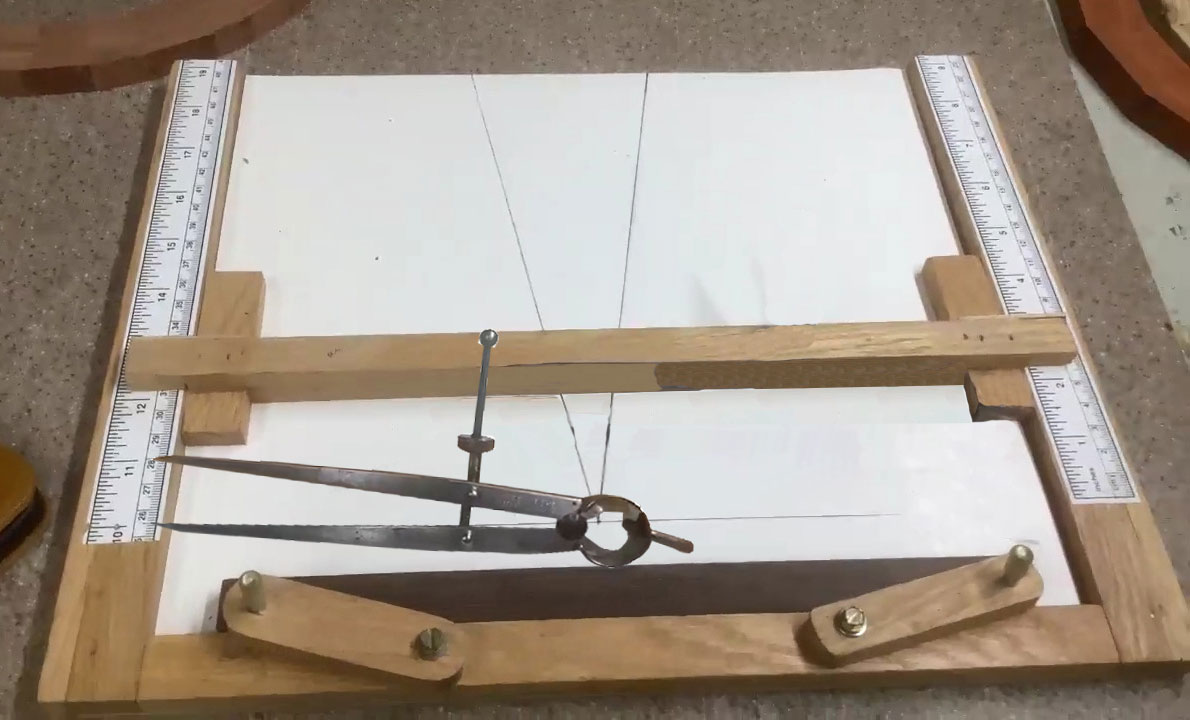
- Divide the diameter of your needed ring in half, get 5″.
- Move the sliding bar up to the 5″ ruler mark.
- Use a pointed caliber, and measure the distance from left and right 10° lines – this is your segment length to be cut.
- Use the caliper and side ruler to determine the length of the segment.
By construction of the Plan Design Board, the sliding bar will be kept at 90° to the side rails and offer a precise measurement for the segment length. To assure correct meeasurment, check that the horizontal line on the graphic is even with the 0 marks on both the left and right tape measures. Also, when the slide bar is in position (5″ up in the sample case), make certain the top edge of the slide bar runs through the same location (number) on left and right rulers.
Using the Segment Length
The picture below shows one (of many) table saw setup that could be used with the
measured segment length for cutting segments.

To use the segment length:
- Set the miter gauge to 10°.
- Place a wood strip in the miter, extending the length of the segment
passed the blade as shown in the diagram. - Adjust the stop block in, touching the extended wood, to allow replication of that length segment.
By construction, the stop block is raised slightly above the table surface. add an
equally thick piece of plywood under the wood strip (1) assure contact to stop, and (2)
leave room for prevent sawdust from effecting the cut. I use a 3/8″ gap between surface
and wood.
Procedures Step by Step
- Use your plan design board to determine segment size.
 Put a piece of paper on the board.
- Secure the paper to the board with clips and bar.
- Draw a horizontal line between zero points on the rulers.
- Use a protractor to draw the angle lines appropriate for the number of segments
that you want in your ring (use the table above that associates segment counts to angles). - Place the sliding guide on the design board.
- Assure the horizontal line is even with the 0 marks on the rulers of each side.
- Slide the sliding guide to 1/2 the diameter of the ring you desire.
(Again, if you want a 10″ diameter ring – slide the guide to the 5″ mark
on the side tape measure. - Use calipers to measure the distance between the two lines
on the top edge of the sliding guide. (Measure inside of the ‘V’, measuring
from left and right lines). - Place the calibers against a side tape measure and read the
separation of the caliper points. Use this measurement when cutting the segment.
- Use the measurment.
- Transfer the measurement to a ruler.
- Place the rule against the miter gauge and slide the ruler to saw blade.
For precise ring sizing, measure this length to the furthest tip (right side)
of the saw blade. - Clamp a piece of wood (to form a measuring block) for duplicate cuts.
- Make the first cut (cut off the end to get the starting angle),
flip the wood to make the second cut. - Place a measuring tape or ruler against the longest length.
If cut and measured correctly, this distance should match the
calculated segment length. - For each ring diameter, adjust the block distance relative to the saw blade
to increase or decrease the segment length to the desired sizing. - Continue cutting the required number of pieces for each ring.
 Put a piece of paper on the board.